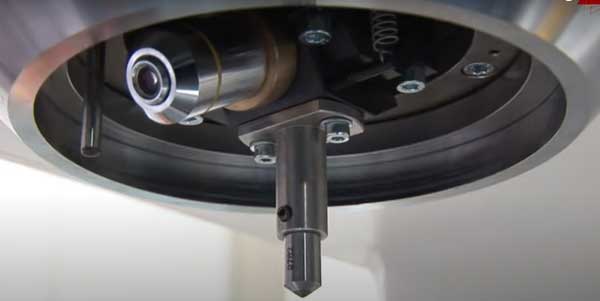
Vickers Hardness Testing
Hardness is a characteristic of a material, not a fundamental physical property. It is defined as the resistance to indentation, and is determined by measuring the permanent depth of indentation. Put more simply, when using a fixed force (load) and a given indenter, the smaller the indentation, the harder the material.
Indentation hardness value is obtained by measuring the depth or the area of the indentation using different test methods.
Vickers hardness testing, also called microhardness testing, is typically used for small parts, thin sections, or or case depth work.
The Vickers method is based on an optical measurement system. The Microhardness testing procedure, ASTM E-384, specifies a series of light loads in which a diamond indenter makes an impression that is measured and converted into a hardness value. It is very useful for testing a wide range of materials, but the test samples must be highly polished to measure the size of the impressions. A pyramid-shaped diamond with square base is used for testing on the Vickers scale. Usually the loads are very light, ranging from 10gm to 1kgf, although "Macro" Vickers loads can reach 30kg or more.
Microhardness methods are used to test metals, ceramics, composites and almost any type of material.
 Image..www.hardnessgauge.com
Since the indentation in a Vickers test is very small, it is useful for a wide range of applications. Testing very thin materials such as films or measuring the surface of a part, small parts or small areas, measuring individual microstructures, or measuring the depth of case hardening by cutting a part and making a series of indentations to describe a profile of the change in hardness.
In microhardness testing, it is usually necessary to prepare the specimen in cross-section so that it is small enough to fit in the measuring device. In addition, sample preparation will need to make the surface smooth to allow regular indentation and proper measurement, and to ensure that the sample can be held perpendicular to the indenter.
Often the prepared specimens are mounted in a plastic medium to facilitate preparation and testing. Impressions should be as large as possible to maximize measurement resolution. (Errors increase as indentations become smaller.) The testing procedure is subject to problems due to operator influence on test results.
Reference(s) ..www.hardnesstesters.com
Basic principle and practical procedure of the Vickers hardness test
OTHER TESTS OF (HARDNESS)

